Almost every technician has common tips and tricks for chassis repair that your fellow alignment, chassis, and service technicians could sit down and discuss for weeks. When you work in a workshop with workshop policies and procedures, in addition to your own habits, likes and dislikes, it seems that things are always done a certain way.
By Technical Editor Ron Henningsen and Editorial Director Jim Wilder
You show up in the morning, put on your uniform, open your toolbox and go to work. At the end of the day, you close everything and go home. Do you ever stop and consider what you've done all day? Do you think about how you did your job and what could have been learned or developed as a new skill or technique to facilitate your work and make it more effective and efficient? This article is designed to do just that: to give you something to think about; to think outside the box, so to speak.
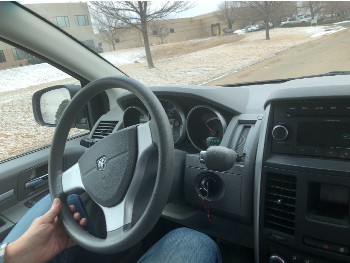 Many workshops today have lost the habit of testing vehicles on the road, especially for anything other than a specific driving complaint. Take the vehicle for a walk, as shown, to see how it handles and how it acts. You may encounter a situation where the vehicle does not return easily from a right turn, which instead of returning makes a left turn; it's actually quite difficult.
 Take a couple of pieces of tape and a marker with you. When going straight on the road, mark the tape on the spine and the tape on the steering wheel, referencing where the steering wheel is. This should match what you find in the alignment rack. If not, there is a problem somewhere in the system.
 The vehicle in the first photo did not return from a right turn because this shock absorber was bent and an enormous amount of lateral force was exerted on the suspension pad assembly. This took some time to examine the vehicle. If there is a lack of steering wheel return capability, you need to take the time to figure out why and not automatically assume that it is just a situation related to the angle of alignment.
When you replace the shock absorbers, you save time and trouble by placing a magnetic bubble indicator on the rotor with a pair of nuts holding it in place before removing it. After removing the old shock absorber and installing the new one, change the assembly until the bubble indicator has the same reading it had before. This will make life much easier by passing it to the alignment rack to adjust convergence.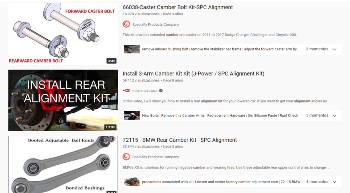
When you get a vehicle in your shop that's anything but a front-wheel drive four-door, like a Camaro, Mustang, or one of Chrysler's performance vehicles, the specifications in the reference books will often tell you that things aren't so alignable, but they are.
Go to YouTube and type in the specific vehicle and look for the aftermarket kits that may be available to make the car fully alignable and deliver the driving performance the customer really wants.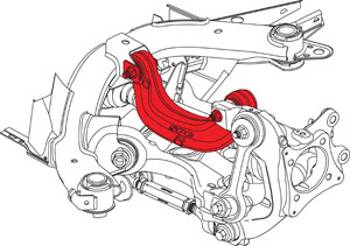 Some of the specific information presented on YouTube and on the provider's website is displayed. This is a top control arm adjustment for a late-model Ford Mustang that you won't find in most alignment equipment information list or in the electronic information retrieval systems found in most workshops.
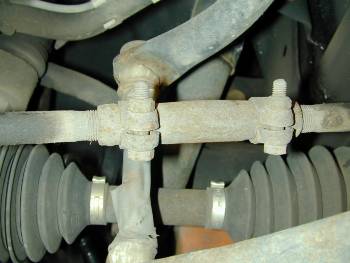 Of course, this is an old-style tuning sleeve in a parallelogram-like steering system, but the fact is that literally millions of these vehicles are still out there. When carrying a vehicle for alignment, look at the ears on the clamps on these fitting sleeves. They should be as shown: parallel to each other and not so tight that they touch each other.
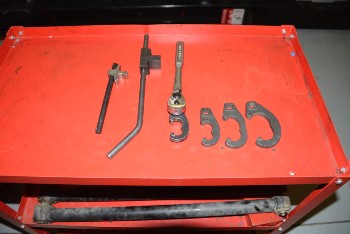
Continuing with the convergence adjustment area, a pipe wrench or locking clamps are actually the least desirable tools to use in a split steering sleeve like the one in the previous photo. A variety of tools are shown here. These tools work best because, unlike locking pliers and pipe wrenches, they do not create clamping on the cuff and allow it to rotate more easily when used.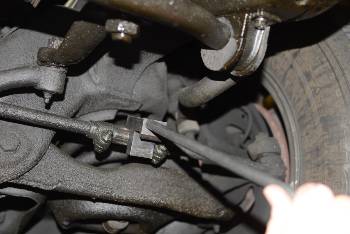
This strap tool is being used. Look at the area where the tool, the second on the left in the photo above, is inserted into the split sleeve and how the load of the rotation point is distributed over a wide area, unlike a pipe wrench that would make it get a little stuck.
Younger technicians generally do not possess these tools, since nowadays everything is pinion and zipper with a locknut. Locking calipers can be used at the inner end of the coupling bar to turn it, but many trucks that exist and some older vehicles still require tools that work well to allow for precise adjustment of convergence.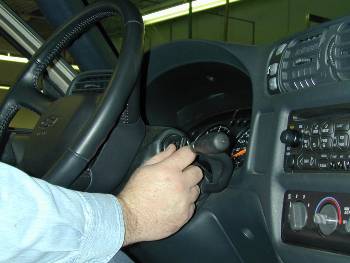
Although most alignment equipment manufacturers don't mention it and it's not actually taught very often, I personally always turn on a vehicle and adjust the convergence with the running engine. This has become even more critical with vehicles with electronic power steering.
In some brands of vehicles with electronic power steering, when started, you can feel the engine activate an initial activation voltage of the zero preloader. Although it is not mandatory, it is highly recommended to do so because if there is any influence due to the power steering hydraulic system, or the electronic assistance engine, you can easily detect it in your alignment equipment when you start the vehicle.
You may find it advisable to always keep the outer end of the coupling bar at right angles to the bolt when adjusting. It is the exception rather than the rule, but some vehicles, due to their geometry and alignment of the parts, cause a slight change of convergence when the end of the steering bar swings back and forth. 
This is an alignment screen for a specific make and model of vehicle. Keep in mind that today's lineup team is 'smarter' than ever. In this vehicle, the alignment readings are all in 'green', but the distribution of the tilt from side to side still needs to be corrected. Please note that this vehicle requires restart or service of the restart stability control system as part of the overall alignment.
Convergence that's as far apart as shown in this photo (in fact, it doesn't even have to be that far away) will fight any tilt adjustments you're making. You adjust the convergence and the angle of fall will change. You adjust the inclination and the convergence will change. With convergence in the green gamut to begin with, you'll eliminate a lot of hassle and improve your workflow.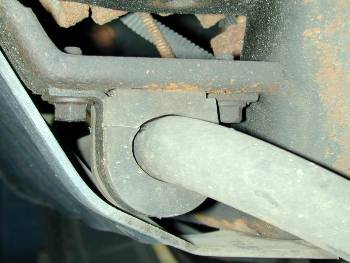 One service area that is often overlooked in many vehicles is that of the frame mounting bushings for the stabilizer bars. When they squeak or make other noises, they receive service. Before they get to that point, no one really inspects them. Look at this bar. It can't be seen in the photo, but the tight bar on the back of the hub has considerable space at the front. This occurs with the weight of the vehicle on the tyres or with the vehicle sitting at its normal operating height. Here is a problem, even though the bar and hub are not very worn.
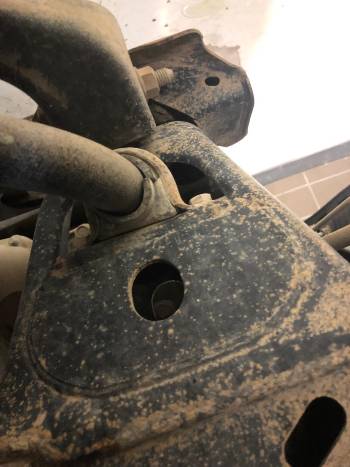
This is an old Asian car with a failed stabilizer bar hub. It's actually a split hub. You can see the bottom start crawling or slipping off the stand. This allows a considerable amount of body movement before the anti-roll bar reacts, causing a lack of handling and control for the customer.  This is an asymmetrical lower control arm from General Motors. In any other situation like this, where one hub from the control arm is farther away than the other hub from the lower kneecap control arm, it has an asymmetrical control arm hub. The rule is that the hub that is furthest away is the one that controls the advance.
For this reason, if you have a situation where you have a vehicle handling problem when braking sharply, you should check the hub on the part of the control arm that is furthest from the kneecap. 
This is Chevrolet's old top control arm. If you draw a line from the end of the bolt through the cam, through the hub and control arm to the head of the bolt, you can easily see that the control arm assembly with the hub has moved considerably upwards.
In other words, the bolt is no longer in the center of the hub and the center of the control arm. This is due to a defective bushing. Simply, this part must be replaced before any alignment attempt is made. 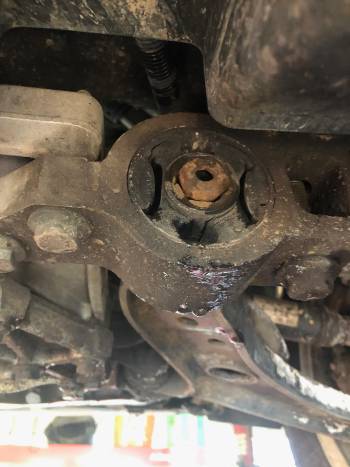 When the weight of the vehicle is in a step elevator or in an alignment frame, this hub does not indicate any problems. The moral of the story? Check hanging vehicles and check them with the weight of the vehicle on the tires. This particular vehicle had a noise problem during tight corners. If we had only inspected it while it was on a driving rack, we might never have encountered this problem.
 This lifted Dodge truck was a real "problem kid" that I worked on for some time. The vehicle had an aftermarket lift kit that had been installed before the customer purchased the vehicle. We did everything, but nothing corrected the 3/4 to 1 inch tilt at the front of the vehicle.
Finally, one day another person who had considerable experience at Chrysler came into the workshop and said, "They have the wrong spring on the left rear." "What do you mean? Both are the same." His answer was, "No, no. Chrysler uses a different spring on one side of the rear because of the weight of the fuel and the gas tank that is predominantly carried by that spring."
We corrected the spring situation in the rear and, guess what: the one-inch height difference at the front was gone and we were able to align the vehicle and make it run properly.
Just this tip: If you work on Dodge pickups and replace the rear springs, it may be worth the time it takes you to read this article.













Hola, Alvin. Muchas gracias por tu apreciación. Procuramos que así sea. Te invitamos a continuar atento a todo siguiente contenido. Los mejores deseos.
Hola, Alvin. Muchas gracias por tu apreciación. Procuramos que así sea. Te invitamos a continuar atento a todo siguiente contenido. Los mejores deseos.